How To Make Hot Process Soap in the Microwave
Making soap in the microwave is a great way to make a small batch of hot-process soap. It’s probably not any more dangerous than making hot processed soap with any other method. However, I must make some necessary warnings and cautions before we begin. This method is an advanced soapmaking technique, and should not be attempted by anyone who is not familiar with cold-process soapmaking, or anyone who is not prepared to watch the microwave continuously while the soap is cooking inside! I made my entire one-pound batch of soap in about an hour. Watching the microwave took about 10-15 minutes. Please read through the entire tutorial and familiarize yourself with the process and photos before you begin.
Formulating a recipe: I use my regular soap recipe, and calculate a one-pound batch using Soapcalc.com. This is a great size because it is small enough to fit inside the microwave (must have room for expanding soap), and large enough that I can still submerge my stick blender. I use the water amount recommended by Soapcalc, which is 38% of oils.
Equipment needed: The same equipment you normally use for making soap is what you will need to make soap in the microwave. Since you’ve made soap before, you know what this is, right? The only thing that is different for me is that I use a 64-ounce pyrex batter bowl to melt the oils, and mix and cook the soap. You must have a bowl that is clear so you can see the soap climbing inside.
Let’s begin!
The first thing you must be acquainted with on your microwave is how to set the power level to 5, or half power. I NEVER use full power to melt the oils, or cook the soap. On my microwave, I have to push “time cook”, then the time, for example: “2” “0” “0” for two minutes, then “power level” then “5” and “start”. Yours might be different.

Step 1: Measure and melt the solid oils and butters. Using half power, I melt my oils a minute at a time, stirring after each minute until they are mostly melted. Then I stir until the rest melts, and add the remaining liquid oils.
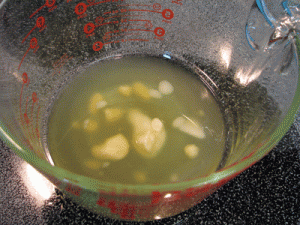
Step 2: Measure and mix your lye solution. Mine is a simple water and lye mixture. Be sure to start with cold liquid!
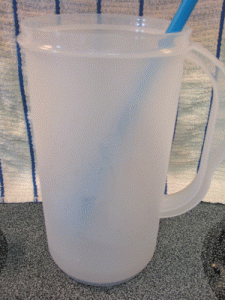
Step 3: This is the best part about making hot processed soap – you can add the lye solution directly to the oils as soon as it is properly mixed without paying any attention to the temperatures.
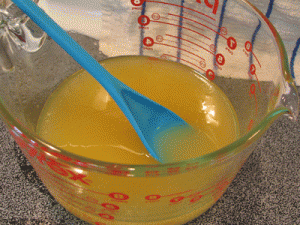
Step 4: Stick blend the soap until it’s too thick to blend any longer. Now it’s ready to cook!
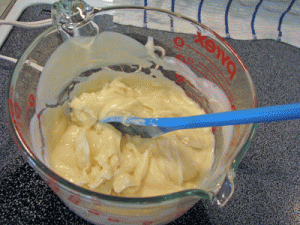
Step 5: Cooking soap in the microwave involves a repetitive process of cooking, watching, and stirring. With a one-pound batch, I start cooking the soap in the microwave for two minutes at half power. Since different microwaves cook differently, you will have to watch your soap carefully the first time you make it in the microwave. This is what my soap looks like after cooking two minutes at half power, and stirred down:

Then I cook it another two minutes at half power. The soap was still actively bubbling when I took this photo:
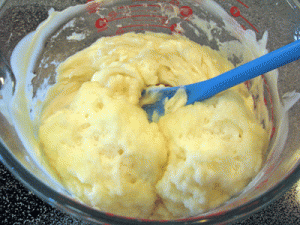
Step 6: Continue cooking, watching, and stirring. I set the time for about five minutes at half power – BUT I DON’T LET IT GO THE ENTIRE TIME. Watch. When the soap looks like the photo below, OPEN THE DOOR OF THE MICROWAVE IMMEDIATELY AND STIR. (You don’t have to let the soap get this high to open the door and stir it down. This was getting precariously close to volcano stage!)
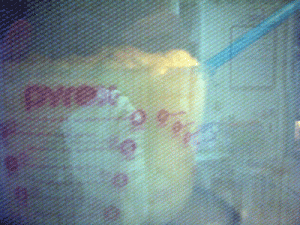
Stir down the soap each time it bubbles up. This photo shows the “applesauce” stage, where there is a bit of separation. You can see some liquid, and the solid parts are little balls of soap:
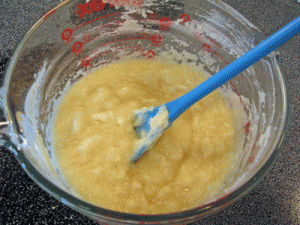
Continue to cook, watch, and stir.
Time saving tip: If you just open the door of the microwave and don’t hit “stop/clear/off” each time, then you can just put the soap back in the microwave and hit “start”. You won’t have to re-set the time and power level each time. If the time is running out, I hit the “add 30 seconds” button a couple times to keep it going.
When the soap is mostly translucent after stirring it down, it’s done! The soap will hold together and the consistency is like mashed potatoes. (This process varies each time I make soap in the microwave. This time it took about 2-3 times of cooking and stirring down before it was done. Sometimes it takes a lot more. If you find that the soap is bubbling up after just a few seconds in the microwave, it probably has plenty of heat and just needs to be stirred longer.)
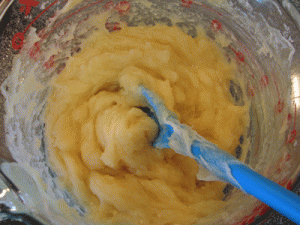
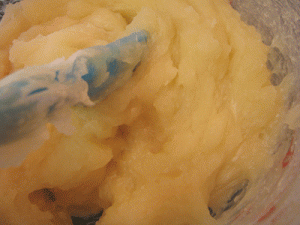
Step 7: Add color and fragrance. I didn’t add fragrance to this particular batch. You will want to test the temperature of the soap and add it when the soap is below 200 degrees or so. (The flashpoint of a fragrance is the temperature at which a fragrance can combust if exposed to open flame or spark. Adding fragrance oil to soap that is above the flashpoint will not cause it to combust. With fragrance at room temperature and no flame, there is no cause for concern.) As a general rule, you will use less fragrance for hot processed soap than for cold processed soap. If you normally scent your CP soap at 0.8 oz per pound of soap, you can back that off to about 0.5 oz. per pound. I add colorants at the same rate as cold processed soap.
This is going to be plain RED soap:
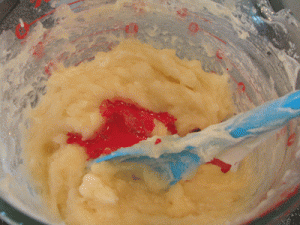
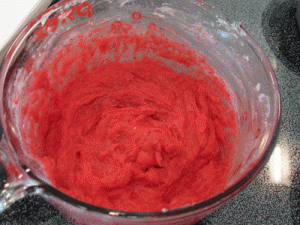
After the fragrance and color is mixed in, you can mash the soap into your mold and let it sit overnight. You may be able to cut it the next day, but if it’s still soft, you might have to wait a little longer. When I make soap balls, I let the soap cool in the bowl, then scoop it out with a spoon and form balls with my hands. I can get consistent sizes by weighing soap pieces on my scale before I form them.
Technically, hot processed soap is ready to use right away. You may want to let it cure out some of the excess liquid if it’s still a bit soft. However, if you’re planning to make soap balls to put in another batch of soap – it’s ready as soon as the balls are rolled!
Any questions?
Page with Comments
Comments are closed.
Yikes… it takes a little longer, but somehow I feel safer with the crock pots. Good for you for trying this, though!
@Larissa – I was plenty scared the first time I tried it, but it really isn’t as scary to me as using a crock pot. The first time I made hot process soap, I used a crock pot and it volcanoed all over the counter top because the crock wouldn’t come out of the base. With the microwave, as soon as you open the door, the heat source is gone and the soap stops climbing.
So Cool! I’ve always been intimidated by HP soap making, but I think I can do this-especially for making soap ball embeds. You’re becoming an invaluable resource:D
@Patrice – I aim to please! You go, girl!
I appreciate the lengths you went to experiment with this method. Very time intensive but offers soap makers like us another way to go that can be more suitable, depending on the client or event that we are planning for. Very helpful information. Thanks for including the photos and putting together such a detailed, step-by-step version of doing this. Very helpful indeed!
Oh I may have to try this! As you know I love the HP, but is there a trick to making them as moisturizing as CP? I’ve used the same recipe & superfatting goodies, but it just doesn’t seem quite as rich. I would love to “perfect” the technique to equal the skin-conditioning of CP. Any tips Amy? 😀
@Michael – Glad this is helpful to you!
@Becky – I guess I never noticed the difference! Anyone else have experience with this?
Thank you so much for this tutorial! I had read about it, but never tried it. I made three batches (12-28 oz) of microwave soap this weekend and all of them are fabulous. It was quite easy…quick, and I am very pleased! Also, I was trying really hard to find a difference in the soap quality of this method compared to the other hot process methods, but I couldn’t. Sudsy, bubbly, very conditioning and seemed much harder after cooling than other hot processes.
@Dorenda – I appreciate your feedback on this method! So glad it was helpful to you and you had such great success!
I just posted this on The Soap Bar!
http://thesoapbar.blogspot.com/2010/11/how-to-make-hot-process-soap-in.html
xoxoxo
Jo
I’ve never attempted HP before as it appears to be a lot of effort but your step-by-step makes it look so easy! definately going to give this a go now.
Thanks for the tutorial. I’ve been considering trying soap making and I’ve been a little hesitant. This method seems very easy! 🙂
I love this! The first time I made HP it came out horribly. I can’t wait to try this. HP seems so much more approachable now.
Hi Amy, Love this Hot Process Method & am going to give it a try, especially for embeds. I’ve only done the Oven Hot Process Method where you do everything like Cold Process & then place your soap filled mold in the oven at 180 degrees for 1 1/2 – 2 hours depending on when it starts to gel. When using lots of colors & swirls it’s sometimes hard to tell when it’s reached gel stage, so I then go by how it smells as to not let it burn, but definitely no longer than 2 hours in the oven. My soaps always have a smooth creamy lather!
Do you wear latex gloves when you handle the soap to make soap balls?? As always, thanks for all your help! You are so creative and inspirational!!
Joanne
@Joanne – I hope you have great success with this method! I’ve tried wearing gloves, but it’s just so much easier to go without. I can feel the soap better, you know? I just make sure my hands are good and clean. 🙂
Hi everyone,
if liquid doesn’t turn translucent.
what do we need do?
Thanks.
@Sotheareth – If your soap has gone through the applesauce stage, and is now sticking together and acting like mashed potatoes, you are probably done. Sometimes the translucent stage isn’t very easy to spot.
So Cool… I going to try this afternoon… i can’t wait to try it!!!! Thank You Very Much to share this tutorial.
When is the best time to add the propolis extract ( alcohol evaporated off completely? I’ve been reading your blogs and would really love to incorporate propolis into a soap, as part of my research work. Also, your works are really fascinating. In case i make my first soap ever, i owe the inspiration from your site.. thanks!
@adel – Wow, I didn’t realize my blog was so inspiring! I do hope you go ahead and make a batch. It’s so rewarding! I’ve never used propolis in soap, but I’ve added honey. Usually you add the extras after the soap has reached trace, so I would imagine it would be the same with the propolis.
I am intrigued by the soap balls/shapes for embedding. Have you used HP soap balls in later HP recipes? Or have you taken HP soap balls and put into CP recipes? Do they need to sit for a period of time before embedding them? Love your step by step here. THank you!
@April – I have only used the HP soap balls in CP soap. The best part is you can use the soap balls right away!
Thank you for this, it is a lovely time saver for when we are short of time.
Thanks for sharing your microwaving process. I see it’s been a few years but may I add some time saving tips? I make 2.5 lb recipes in the microwave and the cooking time for me is approx 8 mins total. This is because I reduced the amount of water that the soap calc has stated. Say, the Lye amount is 11 oz (like for my recipe), I use 20-21 oz of water. Not only does it cut cooking time down, but it also cuts curing time down to about 2 hours when I’m able to cut the soap. As for cooking time, I put my oil and lye mixture in the microwave after it hits trace, I set the microwave on high at 4 mins. I take it out, stir it, and let it sit on the counter for 5 mins or less (it keeps cooking), I then stir and put back in the microwave for about 2 mins or less, watching of course so it doesn’t volcano….usually I can take it out and let it sit again for a few minutes…sometimes I have to cook again, and sometimes its ready to pour into the mold. I’m sure all recipes cook a little differently but I have had the same recipe and have cooked it the same for over a year now with the same outcome at the microwave on high power.
@Jennie – Great tips! Thank you for sharing! 🙂
🙂
I discovered the microwave method by accident…I forgot to plug in my crock pot, put the lid on and when I came back to check it, it was very hard…like Crisco. So I pulled the crock out of the base and tried to microwave it and it worked! I may do this more often! But I’ll do it at trace from now on. LOL
this is a great tip, thank you Amy
Can this be done to make swirls in the soap? I a customer who ordered some soap at a short time frame and I need it to be pink, white, and black for her colors and she wants a pot swirl. Can this be done? With this method.. Or something like that?
I don’t know what your experience level is with soapmaking, but you might check out Sharon Johnson’s method: https://www.youtube.com/channel/UCY6E7n6ntaybGR3JzNJsugw
Hi! Thank you for finding the video! She is really good, It really doesn’t show how she her soap to stay so fluid it just shows her coloring it and putting it in the mold. Any ideas how long to “cook” it in the crock pot so it would get hard in the mold when poured but not turn into mashed potatoes in the crock pot?
I haven’t tried the method before, so I’m not sure. There are several others who have. Maybe try searching YouTube?
I did some searching and found the video below, which is the best in my opinion on showing how the Hot Process – Stick Blend is done. Interestingly, there are many video’s showing folks trying to keep the soap hot in SS bowls and covering it with plastic wrap to keep the moisture loss down (key to keeping it fluid). The gentlemen in the video had a great thought, I’ll just continuously stick blend it in the crock pot. Keeps the batter at around 200F mark and really accelerates the normal Hot Process of stir and wait through the 3 phases…
Fast Hot process soap making method, ie. SBHP
https://www.youtube.com/watch?v=iUN2tRjXHsg&index=3&list=PLRZ6oGtqojf0bENoi3c5DmPIHQ_Tdu2hB
Thanks for this, Wayne!!
Thank you so much for the clear tutorial! After stumbling upon it (yesterday), I just had to try it straight away and it was a success! It was also my first ever batch of soap and I can’t wait to make more this way. Cutting 5cm off the micro-safe bowl that I had bought for the purpose took far longer than making the soap itself but even my tiny microwave could handle the process under strict supervision. 😉 If anything, I may have cooked my soap (at 350W) for a little bit too long (the translucent phase occurred before 5 minutes were up but I wanted to make extra sure it was done).
@Millefey – That’s great!! I’m glad it worked out – thanks for letting me know!
Please, please do not use Pyrex or glass for lye water or raw soap batter. Lye etches glass and weakens it over time. One day that glass can shatter and could cause serious injury. Use a Polypropylene plastic pitcher (#5 code on the bottom) or a true stainless steel. And in case you’re wondering I have been making soap for 40+ years. I have had Pyrex shatter.
I know not to mix lye solution in pyrex. I didn’t know you could shatter pyrex with soap batter though! Figured the lye would be pretty weak by the time it was mixed with the oils.
Hi Amy! Thank you for this tut! Is it possible to over cooked the batter? My batter took forever to reach translucent phase. When it did, the batter dry really quickly. It didn’t look like your translucent phase. Thank you again!
@Sarah – I’m sure it is. If you cook it too long, the liquid will all evaporate out. I’ve learned that usually it gets plenty hot, you probably just need to stir longer to get it to the translucent phase. Hope that helps!
Thanks so much for sharing this, Amy. I never do hot process because I don’t have a crock pot and don’t like the double boiler method. This is something I would love to try!
You’re welcome, Aruna! Obviously it makes fairly small batches, but it works!
Thanks so much for this! I tried it straightaway, and I have to tell everyone something I figured out ….
TIP: As SOON as you see ANY bubbles on top, stir, stir, stir ….. Or should I say, fold, fold, fold, from the bottom of the container towards the top! Seriously, like an omelette.
Beware that the soap batter can be overcooked without volcanoing. The bubbling batter never even tried to volcano in my wide, shallow bowl, but it DID cook at the bottom of the bowl. I, of course, had no idea that was happening, so I didn’t stir nearly often enough.
As a result, I ended up with super-dry mashed potatoes stage (almost unmoldable) soap, but the top was still bubbling! I saved the batch by quickly folding in distilled water until it loosened up enough to mold 🙂
This totally isn’t the poster’s fault, and I’m not complaining. Overall, I’m happy to find this method for small-batches, because I found it much faster than my normal HPCP method. I think it’ll be the perfect for me once I perfect NOT overcooking 🙂
@Mel – Great tip!! I’m sure different microwaves heat differently and using different size containers will also affect the outcome. I’m so glad you were able to save your soap and it proved to be a viable method for you!
hi Amy! great tutorial, thank you so much! how does one make the same microwave recipe using potassium hydroxide? as I wish to whip up a small batch of liquid hp soap in the micorwave 🙂
I’m not sure, Dolly, as I’ve never tried it, but I would imagine when you need a bit of heat, you would do it very gently the same way.
Thanks a lot Amy, also, how long did it take the soap to come to mash potato (finished soap) ?
Sometimes it happens really fast – in 15 minutes or less, and sometimes it takes longer. I haven’t figured out why that is.